SUP Paddle Technique — Form Fixes and Drills for a More Efficient Forward Stroke
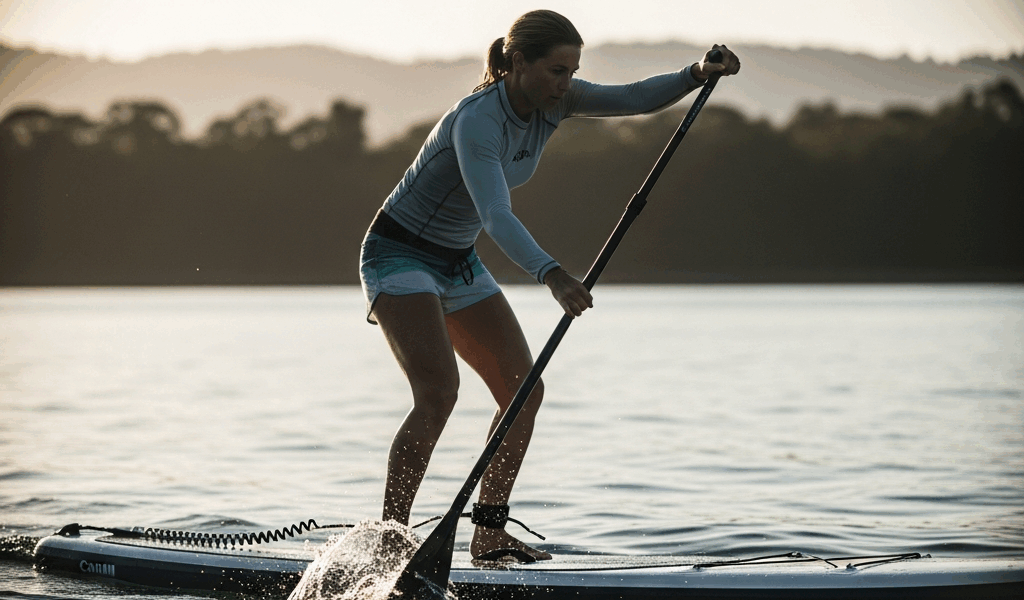
SUP technique is surrounded by more bad advice than good at this point. Having spent an embarrassing amount of time paddling wrong, I built up a pretty thorough understanding of fixing a broken forward stroke — mostly by filming myself and cringing at the footage. You’ve probably already read the beginner stuff. Angle the blade forward. Reach, plant, pull. You’ve been out enough times that falling off every thirty seconds isn’t the thing anymore. And yet something’s still off — shoulders burning after twenty minutes, while other paddlers drift past you looking half-asleep. I spent most of my second season on a 10’6″ board convinced I just needed more effort. Turns out, I needed less of the wrong kind. Here’s what I wish someone had handed me around month three.
The 4 Phases of an Efficient Forward Stroke
Most technique breakdowns treat the forward stroke as one motion. It isn’t. Four distinct phases — and the whole thing falls apart if you rush any of them.
Entry — Bury the Blade Before Applying Power
The entry is where intermediate paddlers hemorrhage energy without realizing it. Blade goes in, power goes on — except that sequence is backwards. The blade needs to be fully submerged before any pulling force gets applied. Full stop. Start pulling the moment it touches water and you’re driving a mix of air and churn forward instead of pushing the board back. You can actually feel this — there’s a slipping sensation at the catch, like a tire spinning on wet gravel before it bites.
Reach forward as far as your top hand comfortably allows — generally twelve to sixteen inches further than feels natural at first. Plant the blade completely. Then pull. That half-second of discipline at entry is where efficient paddlers quietly separate themselves from everyone else on the water.
Power Phase — The Hips Are the Engine
The power phase is the part where most people do it completely wrong. But there’s more going on here — it’s the section of the stroke that determines whether you’ll be exhausted in twenty minutes or still paddling strong an hour later.
Your arms aren’t the engine. They’re connectors. Biceps and shoulders fatigue fast — small muscles doing work they were never designed to sustain. Your core, obliques, and the big muscle groups around your hips and trunk? Those can run for hours. The stroke should feel like it originates from your midsection. Not your hands. Not your elbows. Your midsection. When done right, the arms stay relatively rigid during the power phase — transferring force from a rotating torso rather than generating anything on their own. Probably should have started working on this in month one, honestly.
Exit — Pull Out at the Ankle
The stroke ends when the blade reaches your front foot. Not your hip. Not somewhere vaguely behind you. Your ankle — that’s the cutoff. Past that point the blade geometry changes. Instead of pushing water backward, it starts pushing sideways and levering the board nose downward. That means drag. More on this shortly.
Recovery — Stay Loose
Recovery is everything between exit and the next entry. Relax. Let the arms swing forward loosely — watch elite distance paddlers and their recovery arm almost dangles. No energy expenditure, no white-knuckle preparation. It’s rest inside the rhythm. Tension in recovery bleeds into the next entry and throws off your timing in ways that are subtle and maddening to diagnose.
The Most Common Inefficiency — Pulling Past Your Foot
Frustrated by slow progress despite paddling consistently, I finally mounted a GoPro Hero 11 to an old milk crate on the dock and filmed myself from the side. What I saw was genuinely embarrassing. My blade was exiting the water a solid eighteen inches behind my body — well past my hip, nearly touching the tail pad.
This is the single most widespread form error among intermediate paddlers, and it’s completely invisible while you’re doing it. Here’s the physics, without getting too deep into it: when the blade is beside your foot, it’s nearly vertical relative to the water surface — pushing water directly backward, propelling you forward. As it continues past your foot toward your hip, the angle opens up. By the time it clears your hip, you’re pushing water upward and sideways. You’ve stopped accelerating. You’re actively slowing down.
There’s a visual check that works well. Look back at the water after your stroke — where are the droplets falling from the blade? Level with or behind your torso means you held on too long. The splash should be dropping off behind your ankle. Not your shoulder. Take it from me here and assume more stroke equals more speed.
The Exit Drill
On your next flatwater session, commit to lifting the blade out the instant it reaches your lead foot — not after it passes, the moment it arrives. It’ll feel absurdly early. Your instinct will be screaming to hold on for another inch of power. Resist that instinct. The stroke is done. What you give up in perceived pulling distance comes back as board speed, because you’re no longer driving the nose into the water. Paddle a marked 100-meter stretch with early exit and compare it against your normal stroke. Most paddlers feel the difference within ten minutes — which is both encouraging and slightly annoying.
Hip Rotation — How to Actually Feel and Train It
Here’s a drill that honestly changed everything for me, costs nothing, and requires zero water. Stand up straight. Hold your paddle horizontal at chest height — one hand on each end, like a barbell. Now rotate your torso left and right without moving your arms or feet. That specific movement — ribcage swinging forward and back — is what should be initiating every single forward stroke you take on the water. That’s the feeling you’re chasing.
Left hip drives the right-side stroke. Right hip drives the left-side stroke. If your hips are staying square to the nose while you paddle, you’re leaving most of your available power standing on shore.
The Slow-Motion Drill
Take strokes at roughly one-quarter of normal speed on flat, calm water — the kind you find on early mornings before any wind or boat traffic kicks up. At this pace, each component of the stroke becomes individually readable. Focus on exactly one thing: does each stroke begin with a hip turn? Not an arm reach. Not a shoulder drop. A hip turn. Your top hand pushes forward as the hip rotates. The arm doesn’t initiate anything — the hip does.
When you get this right, the arms feel almost passive. Along for the ride. Power comes from somewhere lower and deeper, and it doesn’t fatigue the way shoulders do. I paddled a full ninety minutes on a rented Naish Nalu 10’6″ during a trip to Hood River — slow-motion drill sets for the first quarter of each leg — and my arms felt fresher at the end than they typically do forty minutes into a normal session. That’s what makes hip-driven technique endearing to us distance paddlers.
Top Hand Position as a Feedback Cue
Your top hand — the one on the T-bar — should be pushing forward during the power phase. Not dropping toward the water. If it’s sinking toward the surface, your blade angle is off and your body is compensating with shoulder mechanics instead of hip mechanics. When the hip is doing its job, the top hand naturally stays level and moves parallel to the water. Use it as a real-time feedback gauge. If the hand is dropping, the hip has already quit.
Cadence vs Distance Per Stroke — Why Fewer Is Better
Paddling fast and paddling efficiently aren’t the same thing. High-cadence paddling — lots of quick, short strokes — looks like effort. Feels like effort. It does move the board. But it moves less water per stroke, which means your cardiovascular system and muscles are working significantly harder than they need to for the speed you’re actually producing.
Efficient paddlers take longer, slower, more deliberate strokes. Fewer per minute, more distance per pull. The board travels further on each catch — which is apparently obvious in retrospect and not at all obvious when you’re out there grinding away at high cadence feeling like you’re doing everything right.
The 100-Meter Stroke Count Drill
Start by find two fixed reference points on a flatwater stretch — at least if you want an objective measurement that doesn’t require buying a GPS watch. Dock posts, buoys, two trees on the shoreline roughly 100 meters apart. Paddle the distance at your normal cruising pace and count every stroke, both sides. Write it down.
Repeat weekly as you work through the technique fixes. Over a training season — sixteen to twenty weeks of consistent work — your stroke count should drop fifteen to twenty percent as each stroke moves more water. A five-percent improvement in the first two months is real progress. Chase the form. Let the number follow on its own schedule.
I started this drill at 94 strokes for 100 meters. Eight weeks later — early exit and hip-initiated strokes, nothing else changed — I was at 79. Same board, same conditions, same pace. That’s form doing work that fitness couldn’t.
Side Switching and Course Correction
Every time you paddle on one side, the board arcs toward the other. Physics — can’t paddle around it. The question is how you manage it, and the answer matters more for efficiency than most intermediate paddlers expect.
Switch Before the Drift, Not After
The common pattern is waiting until the nose has visibly wandered off course, then switching sides to correct. This creates a subtle S-curve across your path — meaning you’re covering more water than necessary to reach your destination. Switch on a schedule instead. Every four to six strokes, before any drift develops. Course stays straighter, rhythm stays consistent, and you stop burning micro-corrections into every few strokes without realizing it.
The J-Stroke — An Alternative Worth Learning
The J-stroke is probably the better pick for longer touring paddles, as continuous distance paddling requires unbroken rhythm. The reason is constant side-switching interrupts breathing patterns in ways that add up over kilometers. At the exit of a normal stroke, instead of lifting the blade cleanly out, you make a small outward sweep — the bottom curve of the letter J — that nudges the tail and corrects the nose drift. Done well, it adds almost nothing to the stroke cycle.
Learning it takes a session or two. Start with an exaggerated outward sweep on flatwater — big, obvious, almost comical — and gradually reduce it over multiple sessions until you find the minimum correction that holds a straight line. Overdoing the J-stroke is actually slower than switching sides. Precision is the goal, not enthusiasm.
You probably don’t need perfect technique on day one, you will need a handful of honest feedback sessions — film yourself, count your strokes, go slowly enough to feel what’s actually happening. The technical pieces here compound. Better exit timing produces more efficient strokes. More efficient strokes free up mental bandwidth for hip mechanics. Better hip mechanics drop your 100-meter count. A lower stroke count means fewer side-switches per kilometer. This new understanding takes hold several months later and eventually evolves into the fluid, sustainable paddling that experienced paddlers know and recognize instantly on the water. It connects slowly, over months of deliberate practice — not in one good session after reading an article. Go count your strokes.

Stay in the loop
Get the latest sup spots updates delivered to your inbox.