Inflatable SUP Repair — How to Fix a Leak in Your Paddleboard
Inflatable SUP repair has gotten complicated with all the half-baked advice flying around. Most guides skip straight to the patching step like you’ve already solved the hard part. You haven’t. Finding the leak is genuinely the harder problem — at least if your board is more than a season old and has seen real water.
As someone who patched my first board, a Nauty Cat 10-footer, through three full seasons of abuse, I learned everything there is to know about chasing down leaks that don’t want to be found. Today, I will share it all with you.
Finding the Leak — The Soapy Water Method
This is where most DIYers fail. They grab a patch kit and start guessing. Don’t do that.
Inflate your board first. Fully. We’re talking manufacturer-recommended pressure — usually somewhere between 12 and 15 PSI for most boards. Use a pump with an actual gauge. A soft board hides subtle leaks. You want it firm enough to feel almost rigid underfoot.
Now mix warm water and dish soap in a spray bottle. I use Dawn — the plain blue kind, $2.49 at any grocery store — because it’s cheap and makes reliable suds. Shake it until you’ve got good foam. Those bubbles are your only leak detector right now.
Spray methodically. Start at the valve stem. That’s where most leaks live, so check it first. Work outward across the top surface in overlapping sections. Slow down. I once blew past a valve leak because I was spraying too fast and never let the soap sit. Five seconds. That’s all it takes for bubbles to form at a leak site — but you have to actually wait for them.
The seams deserve serious attention. Run a finger along them as you spray. Inflatable SUPs use glued panel construction, and that glue separates over time — especially around the rails and bottom seams. Look closely where two panel edges meet. Any bubbling there means the glue line has opened up somewhere.
Check every D-ring attachment point too. Those are the metal rings glued to the deck for bungee tie-downs. The base of each one is a classic failure spot. Found a slow leak at a D-ring on my second board after three years — barely lost half a PSI overnight, took me forever to track it down.
Once you’ve covered the entire top and found nothing, flip the board and repeat on the bottom. Then do the rails. Any bubble formation, anywhere, means air is escaping there. Mark each spot with a permanent marker — draw a small circle around it — so you can find it again when you’re ready to patch.
Valve Leak — The Most Common Issue
Probably should have opened with this section, honestly. Roughly 70% of inflatable SUP leaks start at the valve. It’s the most common failure point and, thankfully, often the easiest to fix.
If the soapy water shows bubbles around the valve stem, tighten it first. Most valves have a wrench flat built in — use a valve wrench (they run about $8 and come with most quality pumps) and turn clockwise. Firm pressure, not angry pressure. Overtightening cracks the internal seal, and then you’ve made things worse.
Spray again. Wait 30 seconds. Bubbles still forming? That’s a replacement situation.
You’ll need a valve wrench tool (around $15) and a replacement valve cartridge — usually $20 to $35 depending on your board brand. Remove the old valve counterclockwise. Before threading in the new one, clean the valve seat. Small brush, compressed air, whatever you have. I once skipped that step and installed a fresh valve directly over a thread full of fine sand. It leaked immediately. Don’t make my mistake.
Thread the new valve in by hand first, then snug it down with the wrench. Spray with soapy water one more time to confirm the seal. Most replacement valves hold perfectly after that.
Seam Leak Repair
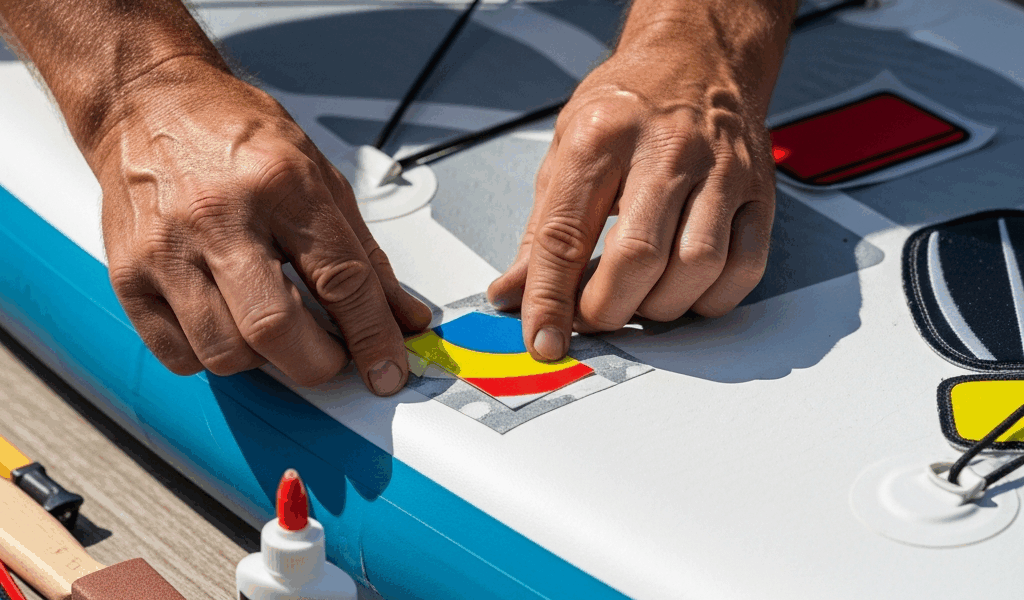
Seam leaks mean actual patching. But what is a proper patch job? In essence, it’s adhesive bonding between two prepared PVC surfaces. But it’s much more than that — the surface prep is where most people cut corners, and it’s exactly where the repair fails six weeks later.
Dry the area completely. Use a cloth — not paper towels, which leave behind fibers. Bone dry. If the leak is on a rail and it’s humid outside, honestly just wait for a sunny day. Humidity wrecks the glue cure and you’ll be redoing the repair in a month.
Sand the area lightly with 120 to 150-grit sandpaper. Circular motion, covering about 2 inches beyond the leak in every direction. You’re creating texture for the adhesive to grip. Wipe away all dust with a barely damp cloth, then let it dry again. Tedious, yes. Non-negotiable, also yes.
Cut your patch from whatever your kit includes — most come with PVC patches in a few sizes. The patch needs to extend at least 1 inch past the leak on all sides. I always cut rounded corners. Sharp corners peel up. Rounded ones don’t. Small detail, real difference.
Apply PVC glue from your kit to both surfaces — the board and the patch. Use enough that you see it squeeze slightly at the edges when you press down. Hold firm pressure for at least 2 minutes. I use my palm and lean my body weight into it. A roller works too if you have one lying around.
Then leave it alone for 24 hours. I’ve watched people inflate and test after 4 hours, feeling proud of themselves, only to have the patch fail two paddles later. The glue needs a full cure cycle. Set the board somewhere warm and dry and walk away.
After 24 hours, inflate and test with soapy water again. That’s your confirmation.
Puncture Repair on the Board Surface
A puncture from a rock or sharp object is actually simpler than a seam leak. You’ve got a defined hole instead of a separated glue line — cleaner problem, cleaner fix.
Size your patch to cover the puncture with at least 1 inch of overlap on all sides. A 3-inch square patch handles most punctures with room to spare. Round the corners. Same as before.
Same surface prep: dry completely, sand lightly with 120-grit, wipe dust, dry again. Apply glue to both surfaces in a thin, even layer. Thin matters here — too much glue and you get a thick bead that takes forever to cure. Too little and the patch lifts at the edges within a season.
Press and hold for 2 to 3 minutes. Moderate pressure, not white-knuckle force. Once the patch is seated, run your fingernail firmly along all four edges. That perimeter seal is where the repair either holds or eventually peels, so make sure it’s fully pressed down.
Twenty-four-hour cure. Then soapy water test. Every time.
When the Board Isn’t Worth Repairing
Not every leak is a repair situation. I’m apparently the type of person who patches things past their expiration date — my Nauty Cat taught me that the hard way.
Multiple seam failures — two or more separate leaks — usually signal systematic glue breakdown. The board is aging out. A single patch runs $20 to $30 in materials. Two repairs, three repairs, they stack up fast against what a replacement actually costs. Entry-level inflatable SUPs start around $300 to $400 now.
Delamination is worse than any leak. That’s when the outer PVC layer separates from the internal drop-stitch structure — you’ll feel soft spots or see the surface bubbling. Patches on a delaminating board are temporary. Six months at best. The board fails again, somewhere new, and you’re back to square one.
That’s what makes age the real deciding factor for us paddlers. A 7 to 10-year-old board with multiple leak sites is probably past its economic repair window. The Nauty Cat got three patches over three seasons. The fourth leak, combined with obvious bottom delamination, made the math clear. I donated it and picked up a Red Paddle Co. The relief was immediate and entirely worth the cost.
Repair your board if the damage is isolated. If it’s showing up in multiple places, replacement makes more sense. So, without further ado — stop patching and start shopping.


Stay in the loop
Get the latest sup spots updates delivered to your inbox.